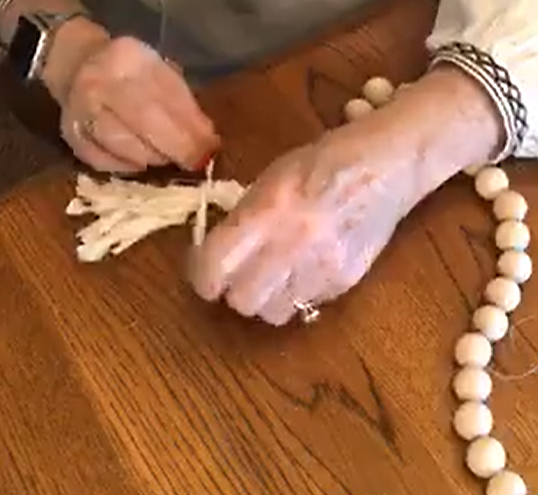
Wooden bead garlands are really popular right now. Especially for vintage and farmhouse decor. Today I’m showing you how to make a wooden bead garland that is simple and beautiful!
If you’ve been anywhere in the last year or so you’ve probably spotted some wooden bead garland. Maybe you’ve even bought one or two. There are so many different sizes and varieties to be found and I seem to like them all. Today I’m showing you how to make your own.
This project is an example of one of the tutorials that I have done in my membership group, Tami’s Making! In that group I do at least 3 exclusive vintage crafting tutorials a month. And sometimes I sneak in bonus tutorials too. The really fun thing about this group is that, when you join, you have access to all the past video tutorials I’ve done. You’d be able to check out the video for this project too!

How to Make a Wooden Bead Garland
When you make your own garlands you get to choose the sizes and the tassel style that you like best. And you can mix it up and make several different ones. As with most of the projects I share with you, there are tons of different ways that you can make these!
I used macramé cord for the garland that I made but you can use just about any type of string or yarn that you want to. You really won’t be able to see the thread that you use so anything you have laying around will work! Just keep extra string on each end of your garland so you’ll be able to tie your tassels to it.
When it comes to the tassels there are so many fun things that you can do. I used muslin shreds because, as you probably know, I love muslin shreds! But jute string looks really cute and rustic too. You could even mix the jute and muslin together! Really you can use anything at all that you like the looks of.
Supply List
- Round wooden craft beads (with holes through them) in any size you like. I used 30 20 mm beads for one of my garlands. the amount you need will depend on your bead size
- Macramé cord (or any string or yarn that you already have)
- Large sewing needle (if the string or yarn you are using won’t easily thread through the balls)
- Muslin shreds (thinly ripped)
Step by Step Instructions
- Start by threading as many balls onto your cord as you want. Leave your cord attached to the roll while you do this so that you don’t have to guess at the length you need.

- Once you have all your beads threaded, tie enough knots on top of each other (leaving some string on the other side of the knots) to keep the beads from sliding off. Then trim your cord from the spool, leaving a fairly long string and tie knots to secure that end.
- Cut your muslin shreds to 12-15 inches, depending on how long you want your tassels.

- Then tie your shreds to the knots on the ends of your beads. Gather the tassels together and wrap another muslin shred towards the base of your tassels to hold them all together.


The Wrap Up…
As you can see, this is a really easy project! And the results are adorable. I do have one quick tip before you start crafting. If, like me, you have a hard time tying knots on top of each other you can add a little dab of hot glue to your knot to make it big enough to hold the beads on.
Also, we talked about string and tassel variations but there are other things you can try too. You could paint your beads if you wanted to. You know I love my Chalk Couture and it would be the perfect paint for this project. Chose a pretty neutral color to go with farmhouse decor. Or pick something bold or bright if that suits your decor better!
However you decide to make these wooden bead garlands I hope you have as much fun as I did!

Make sure you never miss a Live or discount for my website! Sign up here to receive texts and I’ll let you know when fun things are happening! https://my.community.com/tamilovesvintage
Tami’s cell phone number: 740-319-1546
Looking for more decor inspiration? Be sure to follow me on Facebook and Instagram! You can also subscribe to my YouTube channel so you never miss a video tutorial!


